Introduction
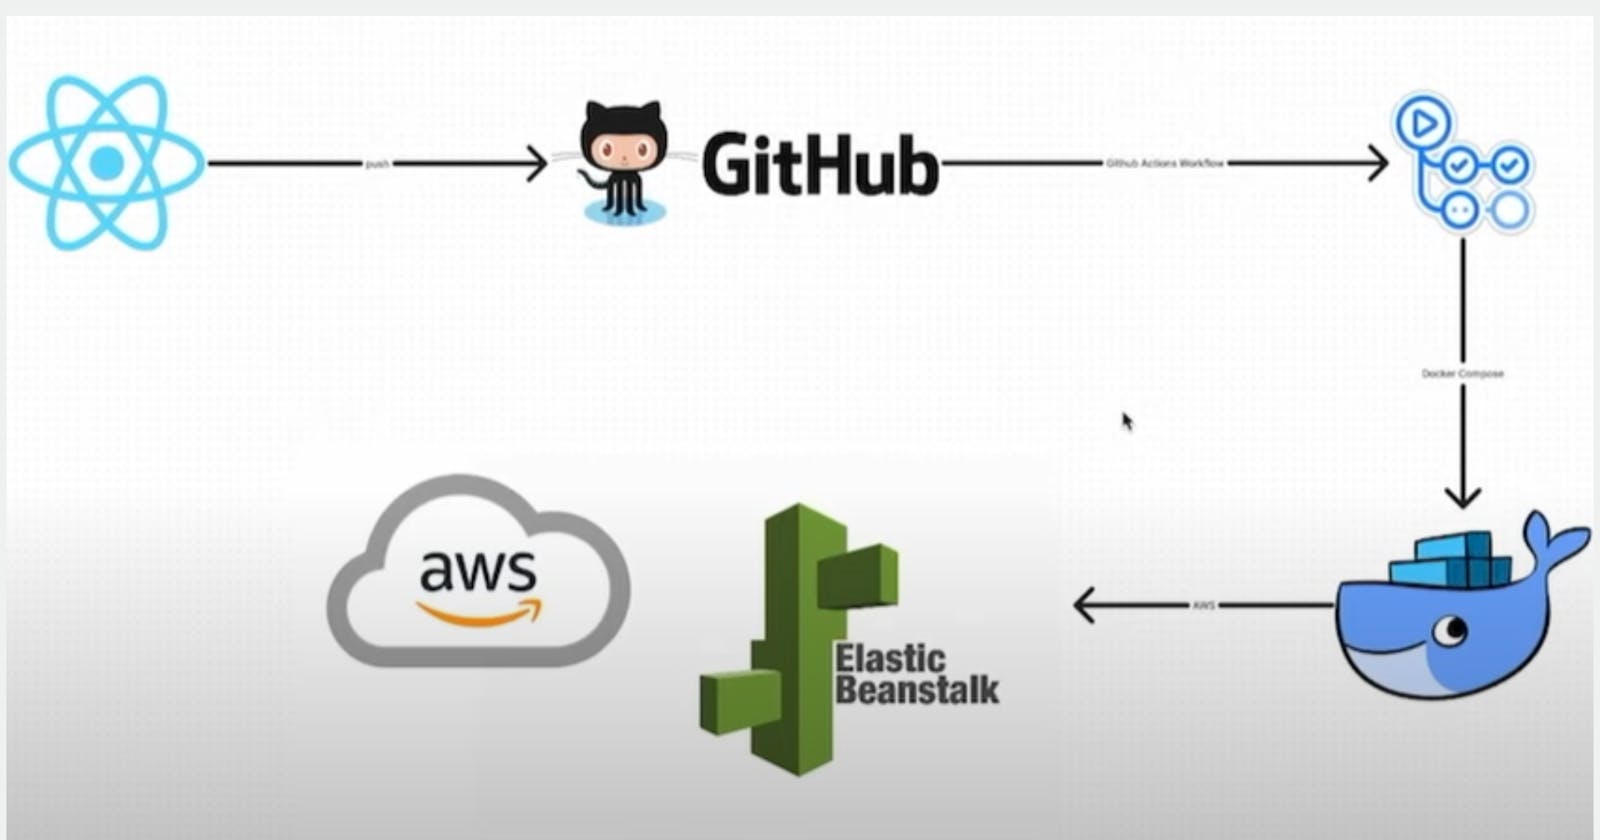
Deploying web applications involves multiple steps, from setting up infrastructure to ensuring smooth deployments. AWS Elastic Beanstalk provides an easy-to-use platform for deploying and managing applications on AWS. By integrating GitHub Actions into the deployment pipeline, you can automate the deployment process, reducing manual errors and saving time.
Prerequisites:
An Ubuntu machine with Git installed.
Access to an AWS account.
Basic familiarity with Docker, React, AWS Elastic Beanstalk, and GitHub.
Step 1: Clone the Source Code
If you haven't already, clone the repository containing your React app.
git clone https://github.com/ArjunMnn/AWS_Elastic_BeanStalk_On_EC2.git
cd AWS_Elastic_BeanStalk_On_EC2
Step 2: Set Up Docker
Make sure Docker is installed and enabled. Use the provided shell script to install Docker.
chmod +x docker_install.sh
sh docker_install.sh
Step 3: Create a Multi-Stage Dockerfile
Create a Dockerfile to build your React app image.
FROM node:14-alpine as builder
WORKDIR /app
COPY package.json .
RUN npm install
COPY . .
RUN npm run build

FROM nginx
EXPOSE 80
COPY --from=builder /app/build /usr/share/nginx/html
Step 4: Build the Docker Image
Build the Docker image for your React app.
sudo docker build -t react-app-image .
Step 5: Run the Docker Container
Run a Docker container with the built image.
sudo docker run -d -p 80:80 react-app-image
Step 6: Configure AWS Elastic Beanstalk
Go to AWS Elastic Beanstalk and click "Create Application".
Provide application details, select Docker as the platform, and choose "Sample Code" as a starting point.
Wait for the environment setup.
Access your deployed app using the provided URL.
Step 7: Enable CI/CD with GitHub Actions
Locate the "deploy-react.yaml" file provided in your repository.
Move it under the ".github/workflows" directory.
Update the file with relevant parameters such as branch name, application name, environment name, AWS access key, AWS secret access key, and region.
Step 8: Trigger GitHub Action CI/CD
Push all changes to the "main" branch of your GitHub repository. GitHub Actions will automatically trigger the CI/CD process.
git add .
git commit -m "Add CI/CD workflow"
git push origin main

Step 9: Check the Result
Verify the Elastic Beanstalk link received earlier.
The sample application should now be replaced with your React app, confirming successful deployment.

Conclusion
Automating the deployment process using GitHub Actions and AWS Elastic Beanstalk simplifies the workflow and ensures consistent deployments. By following this tutorial, you've learned how to integrate CI/CD into your React app deployment pipeline, making it efficient and scalable for future projects.
